Thursday, June 10, 2010

wedded bliss


Today I have been happily married for 4 years!
My wonderful husband surprised me by pretending to leave for work at his usual time, 4:15 am and then coming back a while later with a big vanilla latte for me. My hardworking husband works 60-70 hour work weeks so getting him home for a whole day is basically a miracle. I thought I'd share a few of my favorite wedding memories with you today, but I have to hurry we have a whole day of fun planned and I still have to make our special miniature wedding cake. I have made it every year and when we got married I even submitted the recipe to my baker and made her promise to use it.


Chocolate Orange Wedding cake:
Follow your favorite recipe for chocolate cake but substitute Orange juice for the water portion and replace 1/2 of the oil with sour cream. bake according to directions and allow to cool completely.
Melt 1 regular bag of extra high quality choc chips with 1 to 1 1/2 cups heavy cream and mix until smooth. Sorry it's not exact I always eyeball it. then add a few drop of good quality pure orange extract. pour ganache over cake and enjoy with your beloved.
well I gotta run but here is some eye candy from our wedding day thanks to our amazing photographer and best friend Ray mason. except for the first one that is just one of my all time favorite pictures of =my husband and yes, I did do that to him...

My daddy walking me down the train tracks to the spot on the upper sacramento river where we got married

This is where we said "I do and I will forever"

this still make my heart skip a beat

this is when he put my ring on my finger


now I'm gonna go get me some of these


Peace and chocolate cake

Wednesday, June 9, 2010

Wild Horses


Today I am missing the beautiful horses I grew up with. In my life I have had 2 of my own horses,but was raised with many. I am longing for the feeling of riding a running horse through a open pasture. so I'd like to talk about a few of the gentle souls I've loved through the years. I wish I had a few pictures to share but words will just have to do for now
Jenny was my father's horse whom he had her entire life. She was so sweet and kind and would break away from the other horses and come stand over him and I all night in camp. She was as much a mama to me as my real mother was. She was born a few years before I was and when I was only 6 days old my father took me for my first horse back ride swaddled in his coat on her. Every time one of the other horses would have a baby she too would milk up, nuzzle and help care for the tiny ones. Many times my father tried to breed her, knowing what an amazing mother she would be but of the 8 or so times her tried she was never able to have her own.I am quite sure my father cried all night long when she passed, as I know I did.
Tess was the kind of horse that no man could truly own. She had a wild streak that would be her demise. I remember watching my father patiently cleaning her terrible leg wounds after she ran through a barbed wire fence. she had a beautiful cinnamon colored coat and mane that almost glowed in the sunlight. Tess reminded me of a wild horse whose trust and love had to be earned and deserved. She was our Flicka.
Roger was a horse my father rescued from a negligent owner. He was a 17 year old gelding when we brought him home. He was my first horse and despite how little I knew about riding he was always obedient and gentle allowing anyone to ride him if they could catch him. His previous neglect was considerably worse than what we had thought. His body was riddled with worms and on my 10th birthday his eye fell out. As it turns out although we had treated him with wormer he had one die behind his eye long before we ever got him. After getting him all patched up I had the kindest one eyed horse a little girl could ask for. Raja, as I called him went to live with another little girl whom he could share his gentle care with. Today he would be over 30 so I am sure he has long since passed, I hope he went surrounded by love.
Then there was the horse we only had for a short while. I think my father took him knowing he was sick, but I was so young then I hardly even remember his name. I think he came to our house to die in peace and with people around him. I remember my father coming home at in the evenings and dumping cans and cans of beer into a bucket for the horse. As a child I never understood but now I know it was to ease his awful pain. When he died he was buried in the field alongside the others who had lived full lives and died in peace.
Little horse was the only offspring of Tess. The most beautiful buck skin mare I have ever seen to this day. She had a gracefulness and presence of so much more than just a beast of burden. She loved to run, and would convince the rest of the herd to run along with her. There is something about seeing a herd of horses running that speaks to some quiet primitive part of me. Little was also my horse, and as I look back through the years I wish I would have spent more time exploring the mountains and creeks with her than wasting my time with childish boys. She died with valor on the trail, and as I type I can barley see the screen through my tears. I will forever lament losing my Little, although I will always remember her majestically galloping across the fields.
I guess since nobody reads this I am just saying all this as a way of remembering my own sweet childhood. The love and companionship of a horse is more than any human could hope for let alone deserve, So real and loyal. Hopefully someday my children will understand what it is like to jump on a horse and disappear into the wilderness, Or sleep under the stars and wake up to your loyalist friend quietly munching grass next to your bedroll.


Peace in the pasture

Tuesday, June 8, 2010

I've created a monster


So I made one of these a few years ago for myself when my oldest son was a baby. I have gotten so many comments on it through the years. When I found out that my oldest brother and his wife of 20 years were going to be having a baby I decided to make another. Here is a link for the tutorial I followed when I made the first one.

http://www.craftster.org/forum/index.php?topic=45906.0

I think that polyester fur is yuckie so I decided to use a brightly colored towel instead.I prefer the cotton towel because it is also easier to wash. I also added lots of inside pockets to mine for bottles and snacks. I hope you try to make one also.

Peace don't forget to feed the monsters

Friday, May 21, 2010

How to make a butcher block counter top

In our new kitchen we are installing beautiful copper counter tops that will age and patina naturally. While I love the living finish of the copper I have my concerns about rolling and kneading bread dough on the bare counter and getting the verdigris all over my delicious bread. So instead I talked my husband into doing a section of butcherblock for my baking area, but on our VERY tight budget a brand new john boos block was absolutley out of the question. Ikea has very affordable butcherblock, but the nearest Ikea is about 5 hours away and by the time we shipped it or drove there we could have had a really nice brand of block. So instead I decided to keep my eyes out for a used quality butcher block kitchen table on craigslist. So for $30 I got something like this but with a thinner top


So we brought it home removed the beautiful legs, which I'm going to use to make a farmhouse style table, but that will come later...
Anyhow we cut it to fit and Jessie added some beautiful mahogany to the edge to give it some contrast and durability. We sanded it down, stained it a darker tone and sealed it. Installing it was a breeze, and now we have a custom, butcher block that looks like it was very expensive for about 75 dollars!

Here it is before we stained/sealed it we were dry fitting it make sure it fit nicely

alt=""id="BLOGGER_PHOTO_ID_5473741871299542866" />


and here it is all installed and waiting to get it's beadboard backsplash


Can you see that beautiful black beauty in the lower corner of the pictures, that's my new dishwasher! My mother's day gift. This house had never had one installed and I was VERY tired of doing dishes twice a day.

well I'm off to unload the dishwasher, a task I will never complain about!

Peace notice I do not have dishpan hands

Wednesday, May 19, 2010

A Relaxing Meyer Lemon and Cheese Tart


Sadly I have no Meyer lemon tree of my own...which is probably a good thing because I would be making lemon curd daily and slathering it on everything in sight. Despite that, everyone I know understands just how much I love Meyers so when the season comes around people start showing up with brown bags full of the sweet little beauties. I cooked up this lovely treat last week for a friends birthday and it was delicious and relatively simple. I say relatively because I love to bake, so I enjoy doing things like stirring constantly for 10 minutes. To me it is like chopping wood or bailing hay, a meditative experience that helps me relax. Plus with 2 small children it's is kinda nice to hold still for a few minutes. I make up a larger batch of lemon curd and then use it for several little treats throughout the week. I do not strain my lemon curd because I like to add some of the lemon zest to the recipe but you could always strain it and then add the zest, but alas I am lazy and I don't really mind the little bits of egg that sometimes appear .For the crust I use an old Martha Stewart recipe for pate sucree. All you have to do is toss a few things in a food processor and you have a perfect crust

lemon curd:

8 egg yolks
1 c. Sugar
almost 3/4 c. Fresh squeezed lemon juice(I prefer Meyers)
zest of 1 lemon
1 stick plus 2 COLD tablespoons SALTED butter cut into small cubes

-Whisk sugar, yolks and lemon juice in a heavy bottomed saucepan and heat slowly until well thickened and coats the back of a spoon. Remove from heat and stir in butter i-2 small cubes at a time waiting until the cubes are completely melted and combined before adding more. Cover with plastic wrap and refrigerate for up to 1 week. good luck getting it to last that long.

Here is the Martha Recipe for pate Sucree:

Makes one 11-to 12-inch or two 8-to 9-inch or two 14-by-4-inch crusts
2 1/2 cups all-purpose flour
3 tablespoons sugar
1 cup (2 sticks) unsalted butter, chilled and cut into small pieces
2 large egg yolks
1/4 cup ice water
Directions

In the bowl of a food processor, combine flour and sugar. Add butter, and process until mixture resembles coarse meal, 10 to 20 seconds.
In a small bowl, lightly beat egg yolks; add ice water. With machine running, add the egg mixture in a slow, steady stream through the feed tube. Pulse until dough holds together without being wet or sticky; be careful not to process more than 30 seconds. To test, squeeze a small amount together: If it is crumbly, add more ice water, 1 tablespoon at a time.
Divide dough into two equal balls. Flatten each ball into a disk, and wrap in plastic. Transfer to the refrigerator, and chill at least 1 hour. Dough may be stored, frozen, up to 1 month.
Instead of forming a disk I simply smoosh the dough into my spring-form pan and about 3/4 of an inch up the sides of the pan. Then I refrigerate the entire thing for a half hour and bake it off at 350 with pie weights/ dry beans until it is all golden brown on the edges. It takes my Wedgewood about 13 minutes to to this, but it is a quirky old Wedgewood so your oven may vary, just pay attention to it, you'll know when it is golden brown and delicious looking.

Cream cheese filling:
I package cream cheese (low fat is ok)
1 c. sugar
1 c. heavy cream
1 tsp. Vanilla

In a stand mixer combine Cream cheese and sugar and mix until well combined. then add in the vanilla and heavy cream and mix with whisk attachment until you have a thick spreadable mixture. If you would like you can also add lemon zest to this recipe, it is amazing either way . Refrigerate until ready to assemble.

To assemble:
Spread a thick layer of the cream cheese filling onto the cooled tart shell,(Eat about 3 spoonfuls of filling) then spread a layer of Lemon curd over the cheese filling and refrigerate until ready to serve. I serve mine just like this but the tart would be delicious if topped with fresh berries or candied lemon slices.
With this dessert I like to serve Some Earl Grey tea but, it would also be delicious with a blueberry tea or even coffee.Enjoy!

Peace and crackers!

Tuesday, May 18, 2010

Rainy day love

I thought I'd share a few photos of my beautiful boys. Today is my oldest son's birthday. He is five today, and in my opinion five is one of the best ages anyone cold be. What do you remember about being five?


Peace and raindrops!
Wednesday, May 12, 2010

Because my poor husband needed more to deal with

So the past 2 weeks of my life have been positively consumed with KIDNEY STONES! Apparently the CD/UC meds I'm on have a nasty little side effect of causing kidney stones. My wonderful husband has dealt with the additional baggage with amazing patience and I am reminded every day of how happy I am to be married to this man. And to make me feel even better I received a brand spankin new DISHWASHER for Mother's Day. IT is beautiful and black and if it wasn't installed in the kitchen I'd snuggle with it in bed at night. So thanks honey I love you!

Peace bring me a pillow!

Tuesday, April 20, 2010

Paper bag flooring


Okay so in the process of renovating with very little money I had to come up with flooring that was durable, beautiful, and unique but most of all CHEAP. After surprisingly little net surfing I stumbled on several people who had used brown paper bags to make amazing floors. As soon as I saw the first photo I was sold. now I had to convince my dear "Do it the right way and do it once" husband of my plan. He hesitated at first but as soon as I showed him the photos he too was sold. And the best part is that we could do it all for under $100 and some elbow grease. Here is what we started with 9X9 asbestos tile

Because our tile was cracked, broken and uneven we decided to remove them, but this method of flooring is designed to go over your exsisting floor. But fear not we wore the proper gear and disposed of the tile properly, I promise.


Here is Jessie, my husband, removing the awful tile, and scraping the adhesive off the floors.


After filling the screw holes


the wet paper after having been laid down


Here is the first layer. It is so easy to apply all you do in brush on a coat of WATER based poly and then lay the paper down and brush another coat of poly over it. I ripped all my pieces before I began laying them down I had a trash bag of pieces with a straight edges, and bag of crumpled pieces, and bag of non-crumpled pieces and a bag of pieces that I had hand painted with acrylic paints. All the different textures makes for a more interesting floor but you can do them all the same if you wish. The crumpled paper absorbs more poly than the regular paper. Also as I went I dipped some pieces in the can of poly so they would really soak it up. The more poly that is on a piece the darker it will dry.
When I laid the first layer down it was perfect and took only about 20 minutes. But when I came back in a while later to peek at it the floor was covered in ripples and bubbles. While I had done a lot of internet research on this before I started no one had ever mentioned this. I freaked out and instantly began re-smoothing the floor. My delusions of a beautiful and cheap floor were shot. of course, I spent the rest of the evening pouting. But then when I woke up the next morning the bubbles had all sucked back down and my perfect floor was dry and beautiful.

Next I took out my acrylic paints and mixed them with some poly. I made a brownish sludge and added some metallic paints to give the floor some more depth. I brushed this over the cleaned and dried first layer and it really changed the overall appearance of the floor. Lastly I added 6 more thin coats of poly. The more you add the stronger and smoother the floor is. We live on the coast with 100% humidity so things take longer to dry and cure here. It took our floor about a day to be dry enough to walk on and about a week before we felt comfortable bringing our rugs back in


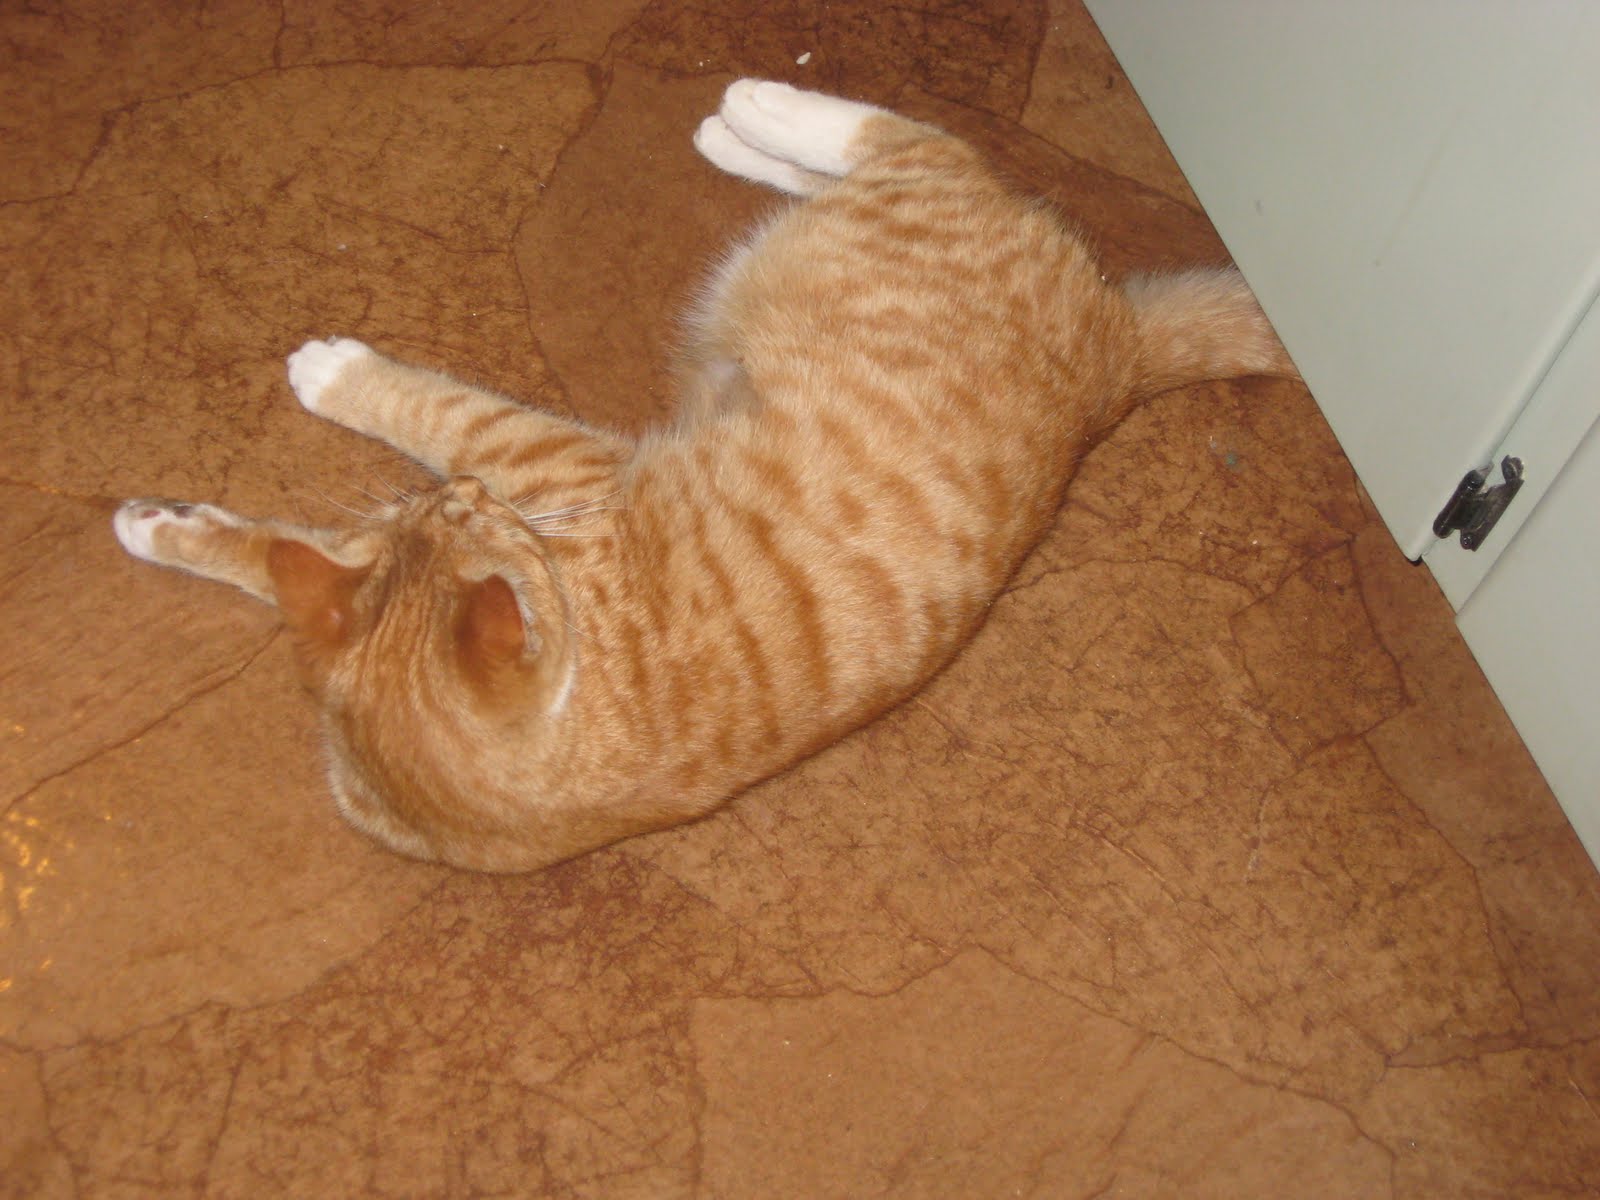
In all we are very happy with this floor. with 2 small children, 2 cats, and a dog it can be very difficult to keep a floor clean. This floor is easy to clean and actually hides dirt rather well between cleanings. I have already dropped dishes, knives, food, and all sorts of stuff on this floor with even making a scratch in the floor. And the best part is if you do get a hole all you have to do is lay another piece of paper over it and add some poly. Plus if we ever decided to upgrade the flooring all we have to do is lay it right over the paper floor and it acts like more insulation. If you were trying to decided if this is the floor for you I say go for it. Since our installation we have convinced many other low budget/green budget renovators to give it a try and they have had fantastic results too.
Have a great day!

Friday, March 12, 2010

Baba Ganoush, the easy way


Okay so to preface this I'll just say that I add things and change things as i go. I tend to cook with out recipes so, I can rarely follow a recipe with out changing things so as to the best of my memory this is what I do to make amazing baba ganoush.
Yes I know that traditionally the eggplant should be grilled and blackened but this is so much easier and just as tasty. I make a lot of this at once so I have enough to last a few days. Usually I just reheat it in the microwave and it is even better the next day.

2-3 eggplants peeled and cut width wise into 1/2 inch slices
1-2 cloves of garlic per eggplant (I love garlic so I use lots, but you can always use less)
3 ish tbsp olive oil
3 tbsp Tahini (NOT peanutbutter)
1 1/2 lemons worth of juice
1/2 tsp smoked or regular paprika or sumac if you can find it
salt & pepper to taste

If you do not have any of these additional spices it's okay I just add them for extra flavor but they are not necessary
1/2 tsp cumin
about 10 Coriander pods toasted and ground
Greek seasoning just a few dashes

Heat olive oil in large pan, chop half of the garlic and add to oil, lay eggplant slices in the oil and brown on both sides. The eggplant will absorb all of the Oil, that's okay, If your garlic starts to burn you can remove it and put it into the food processor. You will probably have to brown the eggplant in several batches. Once you have browned your eggplant toss it in the processor with the remaining ingredients and pulse until smooth. I stop to taste and adjust the puree often. If the puree tastes bitter add another tablespoon of tahini and more lemon. I like to have this with pita or my easy whole wheat flatbread. Enjoy!

Adventures in kitchen renovating on an extremely tight budget


Every Monday I will post the current hair-brained scheme I am testing on my kitchen. For starters lets break down what started my renovating fever.
This is my kitchen tile...horrifying I know!


We bought our home about a year ago, and boy are we happy with it. Amazing hillside views, beautiful oak floors, and an already landscaped yard and many many more lovely attributes. But then there is the kitchen. Our home was built in 1952 and whoever designed the kitchen apparently hated cooking and planned on doing as little of it as possible. Basically the layout is a glorified galley style, with an awkward laundry space added to the right. The flooring was Asbestos 9x9 tile, the cabinets were the all so popular yellow stained pine with those gigantic metal hinges, And to top it all off a smattering of sunshine yellow tile. All of this was poorly constructed and put together, seriously, there is not a level or plum angle in the entire space. I always thought they had carpenters squares in the 50's but I guess not. Most of this I do not have a before picture of because, well I never wanted photographic evidence of my awful kitchen and I got so excited to paint them that I never even thought of taking a pic.

In a perfect world we could gut the kitchen, knock out a wall and build a modern dream kitchen, but in a perfect world I can also eat salad without being sick for 2 days (thanks crohns/colitis!). This is not a perfect world and therefore my hopes of a dream kitchen have been dashed on my decaying counter top tile. Being as we are a young couple still digging ourselves out of our student debt we decided to forgo further debt and just make the kitchen "decent" until such a time comes that we can gut it.

So here was my plan
1. Paint the cabinets
2. Replace the counter top (It has to be done!)
3. Replace the flooring
4. hopefully update the appliances
5. Reconfigure the appliance layout to maximize counter space
6. add more lighting

We decided to do all of this with as many recycled/re-purposed items as we could to save money and landfill space. I set a personal budget goal of only spending $500 total by the end of the project. Needless to say Craigslist is my new best friend. So far we are about $300 in and only have the counter top left to do. I am a neat-freak with 2 small children and no other place to cook so hopefully we will be doing that soon so I may have a finished kitchen...
Related Posts Plugin for WordPress, Blogger...