Tuesday, June 28, 2011

Tuesday 10 - Comfort Foods

Ive decided to start participating in the "Tuesday 10" parties over at Under the Table and Dreaming, and because it's one of those days around that time of the month I'm going to share all of my favorite comfort foods. I found most of the images on Pinterest and now I'm going to have to cook about half of them, thanks a lot pinterest!

UndertheTableandDreaming

{10} Fried Okra- If you think you don't like Okra then let me make you a batch, mine is never slimy!
(from wanderingairstream.com)

{9} Greek yogurt- This is a good recipe for homemade too
(from Salad-in-a-jar.com)

{8} Beer Batter fish- I prefer Halibut
(From thecomfortofcooking.com)

{7} Chocolate anything! But this mousse looks To. Die. For.
(from cafefrenando.com)

{6} Fizzy Water- My beer brewing husband keeps a keg full of carbonated tap water made up just for me, and I drink a lot of it!
(from pinterest)

{5} Cheese! I might as well change my name to Wallace cause I'm crackers for the stuff!
(from Hautedesign.com)

{4} Doughnut Muffins, recipe here
(from me, lilliedale)

{3} Earl grey Latte (London Fog) Even Orion has me make him a decaf one! maybe with a doughnut muffin...
(From pinterest)

{2} Hot Sauerkraut with sausages. Thanks to my intestinal issues I can only eat this every once in a while but that makes it all the more comforting
(from simplyrecipes.com)

{1} Creamy Polenta with Fried eggs. This is my absolute favorite thing to eat in the entire world! I probably have this 2-3 times a week.
(from simplybreakfast.blogspot.com)

Well that's my 10, now I gotta run, I'm starving! Next week I'll post about something other than food, I swear!

Peace pass the salt!

Tuesday, June 21, 2011

Our Summer Bucket List


Yesterday I mentioned that our family sat down and made a list of all the things we wanted to do this summer. I have seen a few really cute "bucket lists" out there on pinterest and I just knew I was going to have to make my own.
I started with this old flower picture form Ikea that a friend gave to me a while back.
All I did was remove the flower poster and paint the frame a nice dark blue. Then I flipped the flower picture (which I actually think is pretty cute) over and made my design on the back.
Using my silhouette and a few different fonts I cut out the lettering and glued them in place.
I wanted to be able to use this for a few years so I replaced the glass of the picture and just wrote our list on the glass with a dry erase marker. It would probably look a lot swankier if I used my silhouette to cut out the list too but then it would not be re-usable year after year, unless we do the same thing every year. Plus maybe next year I'll be able to get my oldest to write the list and then it will be that much cuter!


I was able to make this with just items I already had so it cost me nada, which I always love! The boys are already excited to get started checking things off the list, and so am I!
I am happy to say that we are currently visiting grandparents so I'll get to check that off as soon as we get back home.


Peace and prettier posters!

Monday, June 20, 2011

Our First weekend of Summer

Friday was Orion's last day of kindergarten and I wanted his first weekend of summer vacation to be really fun and special. We packed so much into 3 short days and I still worked 2 full shifts at work, really I'm not sure how we did it, but boy did we have a blast!

Friday I spent all day detailing and washing Jess's truck for his father's day gift and the boys helped out. Now that may not sound like much of a gift but the inside of his truck had not been detailed in over 7 years and the outside had not been washed in maybe 2 years. As I have said before he is a hydrologist/geologist so he spends all day getting dirty and driving on dirt roads. It was a lot of work but he was so surprised when he got home that it was well worth it. Even if I did almost blow up the shop vac cleaning all the junk out of his truck cab.


Friday Night we had a family BBQ on the deck with yummy kabobs, watermelon and a few of these which I definitly deserved after all that cleaning! 


Lemoncello Coolers

While we ate we wrote our summer bucket list which everyone contributed to...More on that tomorrow...

Then we set up the tent in the backyard and filled it with nearly every pillow and blanket in the house. Once it was finally dark we watched the graduation fireworks from the high school down the street while we ate strawberry shortcake with berries from our garden. There must be a fireworks specialist that works at the high school because they have real fireworks for all their football games,graduation, and other events. It's strange to me but hey at least we get to watch them from our house!

Saturday morning I made a huge breakfast of French toast and linguica and eggs. Then we all got ready and headed out to the river for the afternoon.

Even though the water is still too cold to swim in we had a blast watching our dog fetch her stick out of the rapids about a hundred times, and skipping stones, and looking for neat rocks

and eating chips!

For father's day we made breakfast in bed for Jess (which the boys ate most of) and then I was off to work.
I am so glad that the weather has finally cleared up, summer is much more fun when It's not raining!

I hope you all had a great weekend too and I'll be back soon to show you what I turned our handwritten bucket list into.

Peace remember your sunblock!

Friday, June 17, 2011

IF your Happy and You know it...

Thank a teacher! I know I am!
I was going to make Orion's teacher a gift anyhow but then I read the unbelievably sweet note she sent home for him about how special and wonderful he is (it made me cry!)
So then I knew I really had to make something special just for her...

I altered this canvas tote bag that I bought for $1.00 at Michael's by sewing the bottom corners flat. Then I added a little turquoise flower I made and stitched a real pearl into the center.
Next I cut out the phrase " If you're happy and You know it thank a teacher" using my new silhouette and some freezer paper. I simply ironed the freezer paper to the bag and painted the phrase.Then peeled the freezer paper off and filled my bag with some nice organic hand soap, and organic lotion, and a chocolate bar.
Orion and I each made a card ( I cried while filling mine out, I know I'm silly!) and I tucked the cards into the bag.


Today is the last day of school which they call "Dance Day" All the kids, teachers, and parents dance their booty's off on the playground and each class even practices a special dance to preform in front of everyone else. Orion's class is doing the "Boogie Walk," seriously, how cute is that?
We are off to our very last day of kindergarten,  Hooray Summer!

Peace don't laugh at my dance skills!


Ladybird Ln


Thursday, June 16, 2011

Finally Summer!

Today I am packing up to tag along on Orion's kindergarten picnic. There are only 2 days of kindergarten left and boy am I going to be glad to have my boy home during the day. I think I may be more excited for summer than he is!


 It feels like it's been ages since I've last posted and I guess it has been. Since our anniversary last Friday I have been battling a very bad flare up. It looks like my mission to live a non medicated life with Crohn's/Colitis is not working out. When I left off with my GI doctor I was about to start treatment via monthly IV infusions and weekly at home injections of some pretty scary medications. I freaked out at the idea of such heavy treatment and told my doctor I'd be back when I was sure there was no other option. I have been a wreck all week and even while I type this am tearing up with the sheer frustration of not being able in control of my own body. Despite my frustration and exhaustion I have to admit that it is time for me to go back. I know that's kind of a lot to drop on a lifestyle blog but the fact is that it is part of my lifestyle.
 In other less depressing news our weather has been gorgeous we have really been enjoying our yard. Yesterday I watched my best pals kiddos and we played "Mrs. Wolf" and "Simon Says" for hours in the yard. I have to say babysitting is a lot better when we are all outside!
Well I'm off to picnic with the soon to be 1st graders. I've got a basket packed with games, snacks and sunscreen and we are going to have a great day!

Peace and Picnics!

Friday, June 10, 2011

DIY Copper Countertops

As I mentioned in this post a few days ago and this post from a long time ago we fabricated and installed our copper counter tops ourselves. Before ordering our supplies I frequented this garden web forum. It is a long thread but if you are really considering copper surfacesI suggest you read it. There are a few really great tutorials on there and the last one is pretty much the way we did it.
The whole process is very similar to applying a regular laminate. Basically you are just taking this very thin sheet of copper and laminating it to a stronger base.
As I said previously we used 16oz copper roofing material instead of the recommended 20oz sheeting. We were just very careful not to dent or bend it and it worked out fine. we transported it from the supplier to  ourhome sandwiched flat between 2 sheets of plywood instead or the recommended method or rolling it up, cause that's just stupid!
We started by removing all the previous plywood all the way down to the cabinets because the exsisting counter was not level and the plywood had extensive water damage. If your surface is level and in good condition you can just lay the mdf right on top of it. I have heard of people laying the copper on top of laminate but I do not recommend it because the glue is designed to soak into the mdf which it obviously could not do on laminate.


Next we cut sheets of 1/2" plywood and screwed it to the  the top of the base cabinets. On top of the plywood we placed the sheets of 3/4" mdf.   At the corner of the L shape we used  miter bolts in holes we routered out from underneath to join the 2 sections securely.
something like this
To secure the mdf to the plywood we applied construction adhesive in between the plywood layer and the mdf layer and then screwed them together from underneath (ie, inside the cabinets up into the plywood and mdf) But we did not do this until after the copper had been applied, so that we could easily slide the entire unit out to clamp the front edge. confusing I know but stick with me.

For the edges we screwed oak boards into the mdf and plywood  before applying the copper sheeting. Mdf is relatively soft and will dent easier than oak will. This is a pretty standard way of doing edges when applying regular laminate. After screwing the oak boards to the sides we then filled and sanded the holes perfectly smooth so they would not show under the thin layer of copper.
We decided to apply the copper to the sides before putting the top on to avoid having the seam on top. If you have access to or would like to make a sheet metal brake then you can just bend it to a 90 angle and glue it down. I however did not want a rounded edge, but there are a few tutorials around if that's the way you want to go.
We cut strips from our large sheets of copper with a dremel in our garage. This step takes forever but makes a perfect cut without warping the copper as shears would. Simply lay the sheet out with a board underneath to elevate it a bit. then mark your line, put goggles on, and patiently cut along your line. Cut your strip about a quarter inch wider than you need so it can be filed down to fit perfectly after it is put in place.
Prep your surfaces by lightly sanding the back of the copper and cleaning both the oak edge and the copper with rubbing alcohol.

This is the ONLY adhesive I would use, it's worth the money, cleans up with water, is VOC free and has a long working time. You can order it several places but I purchased mine and a glue roller here.
Follow the directions on the glue and apply glue to the back of the copper and oak edge and tape into place.

(See how the entire thing is scooted out a bit so we can clamp to the back edge. later we glued and screwed the mdf to the plywood.)

It is best to have a few sets of hands to quickly clamp the edge. The glue allows quite a bit of working time, but I do recommend cleaning up any that squeezes out with a damp towel while it is still wet. As you can tell we used A LOT of clamps, the more the better! We placed another board over the copper before clamping so they would not mar the copper.
Allow the edges to dry overnight before removing the clamps. Once dry, file and sand the top edge flush with the mdf layer. The copper top will go over this so it is important that it is perfectly flat and smooth.

Next we cut the sheets to just a bit larger than what we wanted our finished size to be.We used the factory edge of the copper for the front and placed our cut edge in the back, this is only important if you are doing a "L" shape or long span and have to have a seam on the top. Ideally you want to mate the 2 factory edges together to make a perfect seam. 

Notice in the picture above that we had already cut out the sink hole out of  the mdf sub-layer. Do this, but wait to cut the sink hole in the copper until after it is glued down.


Prep the back of the copper and the top of the mdf by lightly sanding the copper and cleaning both with rubbing alcohol. We had an "L" shape so we chose to lay 1 segment at a time.

Apply the glue with a roller CAFEFULLY and lay down the copper. Smooth out all air bubbles and cover with another sheet of mdf. You will do this so that the pressure from the clamps is evenly distributed and that the clamps do not mar the surface. 

Here is a general idea of how it should be laid out so that the seam will be on the edge and not on the top. Pretty snazzy sketch huh?

This ridiculous picture is because we figured that the more weight and pressure we applied the less air bubbles we might get. So we placed just about every portable heavy object in our home on top of the mdf. It worked too because there are no air pockets under the copper. Also we did not apply too much weight on top of where the sink would be to avoid denting the copper that had no mdf underneath it.

After allowing the glue to dry overnight we removed the clamps, scooted the whole shebang back and into place and glued and screwed it to the plywood layer from underneath as I discussed earlier.
Next, file and sand so that the edge appears to be 1 solid piece. As I have mentioned before I'm a jeweler/ fabricator so this went fast and easy for me. Mostly you just need to make sure that the edges feel smooth and that there is no gap between the top layer and the edge, If there is then you can squish in some just for copper epoxy putty.
 I purchased mine at Ace hardware and followed the manufactures instructions for use. this is also what we used to fill the seam on the top of the counter. I simply smooshed it into the clean crack, waited for it to dry then sanded it flush.

here is what the finished edge looks like

See how it looks like 1 solid piece rather than 2 sheets butted together.

Here is the only outside corner. It looks like the corner is sharp but is is not at all sharp, it actually slightly rounded at the point. also notice the bit of oxidation on the bottom, it can easily be cleaned off with a scrubby.

Here is the only inside corner that also lines up with the only top seam. The white in the crack is a but of oxidation that I scrubbed off after I snapped this pic. 

In the end we are definitely happy with how we did the counter top but we had to do a lot of figuring and problem solving to make the other methods we had seen work best for our space. If you should choose to install a similar surface you will probably have to do a lot of your own adjusting to make it work for you.
It has been just over a year and I am happy to say that our counter still is scratch/ dent free with the exception of 1 small dent that came with the copper sheet. We have no air bubbles and still love the way it looks is our home. 
If you have any additional questions feel free to ask, I'm always glad to share and help.

Peace and a penny for your thoughts!


Thursday, June 9, 2011

I'm a celebrity! or at least my mom thinks I am...

Earlier today while I was out and about finishing up a few details for tomorrow, which will mark 5 years of wedded bliss for us I received an email that I was going to be featured over at Apartment Therapy. Turns out that I'm not the only one totally gaga over my cake carrier lamp.  You can go Here to read the feature if you want to
Or you can read my original post about my little lamp here


Now with my "I feel so special" smile I'm gonna go frost my mini wedding cake for tomorrow, hopefully at least half of the chocolate ganache frosting will make it onto the cake and not be completely devoured by the boys and I!

Peace and smiley faces

The usual ramblings

Okay so I know I said I'd post my tutorial today on the copper counter tops but yesterday my husband surprised me with one of these...
I know I'm kinda late to the party but I have wanted one f.o.r.e.v.e.r! My sweet but very practical husband just could not get on board with what he called a "knife wielding printer" As much as I'd love to lock myself in my ma'am cave and see what this baby can do I have another baby to tend to. My little one is supremely grumpy today, I dunno maybe he's cutting a molar, but either way my mommy duty comes first. 
Also I will be baking my special dark chocolate and orange mini wedding cake today for our 5th anniversary tomorrow.
Grumpy babes and delicious cakes aside, I will try try try to get that tutorial up today...well see

Peace of Cake!


Wednesday, June 8, 2011

Adventures in budget renovations- Copper Counter tops

As I mentioned yesterday I have had A LOT of emails recently about my counter tops. So today I wanted to share a little bit about them, the up and the downs.
We did our counters all by ourselves, but I am a  Jeweler/metal worker who already has all the tools and loads of experience working with metal. Not that you have to be a metal worker to do this but knowing a lot about working with copper made this project a lot easier for us.


I chose Copper counter tops because of their unique warmth and beauty. I'm just not the granite kind of gal, I hate cleaning tile grout, and we wanted a higher end finish than laminate. My husband and I had always admired the copper counters at one of our favorite coffee shops so we decided to look into copper. I started researching, and reading forums, and calling every metal supplier in my county. Here is a list of everything I feel is important to know about copper as a  kitchen surface. If you still feel like it's the right choice for you then stick around for my tutorial.


  • Copper has a "living" finish, which means that it is constantly oxidizing. Anything that comes in contact with the surface will leave it's mark. This gives the counter a mottled depth and lots of interest, it also looks kind of grungy. I love it but I also have to remove everything from the counter, scrub it down with a sponge and soapy water, and spray a light wax on it 1-2 times a week.
Here it is before I scrub and polish it, notice the "verdigris" green spots from water drops. The spots will come right off but see the ring from a glass over in the right corner, that will not polish out unless you use a heavier polish.

Here is that same spot after it has been cleaned and polished, it's really not much different except now it is shiny and the spots are gone, but all the residual marks are still there

Here is the same polished spot but shot from a different angle, see how clean and shiny it is despite that mottled surface marks
  • You can seal the tops but most clear coats will just scratch and peel off in the heavy use areas.
  • Copper is a soft metal so it may scratch and dent easily. Mine is still dent and scratch free but I am very careful not to drop things on it, drag things across it, etc..
  • If you do get a scratch you can sand it out but depending on the gauge (thickness) of the metal you may wear down the surface.
  • Copper has anti-microbial properties, which you can read more about here, which is great for a kitchen
  • Copper is currently much more expensive that it has ever been. For (2) 3x5 sheets of 16oz copper we paid almost $500! This was for industrial grade copper, which means that it may not be scratch/dent free.I purchased mine from a roofing company, and the man who sold it to me told me I could not make a decent surface with it (which I just took as a challenge) and he tried very hard to talk me out of using 16oz copper.
  • Ideally for a surface you would use 20 oz. Copper. All I could get a hold of was 16 oz. and my counter turned out flawless but it wasn't easy. Basically what it means it that for every square foot there is 16 oz (or 1lb.) of copper, this makes it about a 24 gauge. It is thin enough to bend with your hands but too thick to cut nicely with tin snips.
  • We laminated our copper to mdf using a specialized glue called TC-20. This is the most important part and is what makes your surface feel solid. We chose to use 3/4" mdf over 1/2" plywood for the under layers of the counter. Stay tuned for a tutorial. We ordered the glue from this company, it is not expensive but you do have to order it and wait for it to come so order more than you think you need. you could use epoxy or contruction adhesive but this product is by far the easiest to work with. It is VOC free, cleans up with water, and is relatively cheap.
  • If you have an L shape or corner of length longer than the sheet in your kitchen you will have to consider how you will resolve the seam. You can have the seam braised but it may warp the the sheets and make it impossible to glue down. We chose to make our seam by laying 2 perfectly straight edges up against each other and then fill the crack with a copper epoxy. Yes you can see the seam, no it does not bother me. Truthfully I hardly even notice it, and the epoxy is holding up really well. To me it was much more important that my surface be perfectly flat and fully glued to the mdf than having an invisible seam. 
Here is the seam the day we layed the copper onto the MDF. 
Notice how "new penny" the surface looks
here is that same seam today, it is noticeable but just barely. 
Notice how "old penny" it looks now
  • When you first lay the copper it will be bright and shiny like a new penny, it will quickly turn to old penny. If you do not like the way an old penny looks then this is not the surface for you. It will never stay bright and shiny and perfect looking. It is very important to understand this. If you are not sure how you would feel about it go down to the hardware store and buy a small sheet of copper from the K&S stand. Take the little sheet home wash it with soap and a scrubby and set it out in your kitchen, maybe near your sink. Rub your hands on it, put a slice of lemon on it, get it wet and do a few experiments to see how it oxidizes in your home. If after a few weeks you still like it then go for it!
  • There are a lot of products you can use to clean and wax your counter tops. I tried all of them. For the first 6 months I tried something different nearly every week. To get your surface back to the bright shiny raw state it was when you laid it take half a lemon dip it in salt and rub it on the surface. It will eat away the oxidation instantly. You can then rinse it with water and bam it's brand new again. this is good to do if you get a mark that you really don't like, I do not recommended that you do this more than twice a year. If you do not wax the metal it will darken within a day or so. If you do wax it it will still darken just much slower.
  •  I do not like to use heavy wax like a car wax because it leaves a buildup that you then have to scrub off, yuck! I like to clean the surface with a warm soapy sponge then I towel dry it and apply a light multi-surface wax. 
This one said it could be used on wood, granite, or stainless so I figured Copper was somewhere in between those.

I have said it a few times and I feel like I need to say it again. Copper counter tops are not for everyone! I love them and I am okay with cleaning them constantly but there are still days when I feel like we should have gone a different way. I have had a lot of really nice complements on them but I have also had a lot of negative ones, including a few from a real estate agent about the resale value of installing copper surfaces :(
This was one of our splurges in our kitchen. It is a high end finish for a reason, we were able to DIY them for about a third of the cost of having them installed but it was a ton of work and stress and problem solving.
I hope that answers a lot of your questions, and feel free to keep asking. I will try to get the tutorial up tomorrow so come on back if they are still a surface you'd be interested in.

Peace and pennies from heaven!


Tuesday, June 7, 2011

Art Journaling

Art journaling is something that has always been a dear to me. Even during adolescence while most other girls were gushing into their diaries I was keeping a sketch book. I suppose that's why when I was in art school I never minded that most teachers required that you keep an art journal. Not only is art journaling a very cleansing and relaxing habit but it also helps develop ideas. Many of my jewelry pieces were designs I had quickly doodled into my journal. Now I find that art journaling helps me take a little time for myself, a little time to be creative on a more personal level.
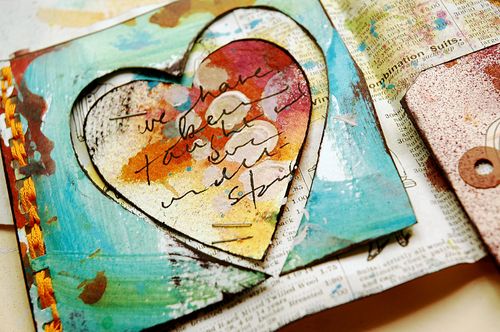
Here are a few beautiful pages done by other artists. There are so many ways to be creative, but art journaling has to be one of my favorites. This non-pretentious art form only requires a pencil and paper, so grab one and let your beautiful creativity flow!

via 

This week I am feeling very emotionally raw having spent the weekend at a memorial for a someone who was very dear to my heart.  I have had a lot of emails recently about my copper counter tops and I hope to be back soon with a closer look at how I did then. For now; however, I need to take a little time with my art journal. Have a beautiful day!

Peace & pencil shavings!

Related Posts Plugin for WordPress, Blogger...