Saturday, April 23, 2011

Easter Brunch

I hope the sun shines brightly on you and your families as you celebrate your Holiday

Our Easter Brunch this year is a scrambled eggs with emmantalier cheese and green onions, Greman pancake with Kahlua caramel sauce and fresh fruit!

What are you having?

Peace and Jellybeans!


Thursday, April 21, 2011

What a week!

My new porch came in the mail yesterday, I'm so excited!
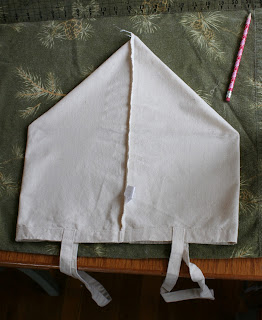
We have been wanting to build a covered porch or pergola or something since we moved in but currently we are up to our eyeballs in projects and it's just not an option right now. So what's a girl to do? I ordered myself a new porch off Amazon. something like this...
Well it's kinda a porch... well okay, it's a huge shade sail but it will take my currently overly exposed deck and make it a comfortable shady wonderland. Long story short it was less than a $100 and it will cover the back deck and it has a 10 year warranty. I was told by my darling yet fed up husband that I was not allowed any more projects and a covered porch is definitely a project, but this as simple as installing hardware and tightening ropes.


Because when you look like this your not allowed to play out in the sun for too long before you crazy mommy makes you seek shelter form the sun.
That's right, with the exception of trips to the river or pool I completely refuse to put sunblock on my kids! Yep I'm crazy I know, but neither of them has ever had a sunburn!

Tangets aside, I am very excited to get it all hung up, I'm also pushing for a hammock but that idea has been shot down, the nerve!

 We are still yet to get dirt into our raised beds, so there they sit looking like empty coffins in my backyard, beckoning to my children to climb in and use them as all sorts of imaginary race cars, ships, and airplanes.
Apparently 1/2 c.Yard of organic soil is hard to find in these parts, which means we get to buy 13 bags of soil at about $10 bucks each! Ouch!

Next week is the boys spring break and they are going to Camp Gramma's for the week. I hope to get a lot of projects done to make up for my lack of creativity this past few weeks. So check back, I promise I'll actually do something interesting at some point!

Well that's about it for the random and mundane news report, have a great day everyone! I can finally breath through my nose and have stopped sneezing constantly so things are really looking up for me.

Peace and cold tea on the porch!

Monday, April 18, 2011

Living within your means

With the approach of Earth Day there is a lot of chatter about living a "greener" life.  Not only is it a benefit for the planet but in many ways a benefit to your wallet. My husband and I have always tried to live responsibly and reduce our impact.
Over the years I have come to find that the biggest difference in attempting a greener life is to also attempt to live within our means and be content with what we have.
Not having the money to buy "New" means buying used. Nearly every project in our home renovation has used materials we purchased off craigslist or at the Resale Lumber store. During our kitchen renovation we searched for creative materials to use not only for their price factor but so our home would exude creativity.

Here is a list of the things I think help one feel happier in the home you are in. Sort of a "Bloom where you're planted" kind of mentality:

  •  Trends are expensive-decorate your home with things you love and forget what's "in"or "not in"
  • Make better use of what you already have- Paint, paper &mod podge are all cheap and relatively reversible when you get sick of them
  • Buy used only when it makes sense- when we renovated our kitchen we chose a used fridge but a new dishwasher, generally speaking people are harder on their dishwashers than anything else in the kitchen.
  • Try to come up with creative materials- Our kitchen knobs and lighting together cost us well under $100 and we constantly get comments on how great they. We have something to be proud of and we saved loads of moolah!


  • When using creative materials do loads of research- Before choosing to do brown paper bag floors I spent weeks reading about other peoples experiences, mistakes, pros and cons then I made a large sample of it before deciding whether or not to do it. In the end I knew what my risks were and how to avoid catastrophe, which would just cost more money and time in the long run. P.S. it the best flooring ever in my opinion!
  • If you have out door space, work with it- For me, learning how to keep a yard has been one of the best experiences as a homeowner. Before I took the time to learn, all I had outside was wasted space and chores. Now I am rapidly becoming a true gardener, with a nice yard and fresh organic produce! It is such a great way to connect with nature and have something to be proud of. I have a few projects coming up on that soon!
  • It never hurts to ask- We have had many people give us very nice things for free or next to nothing just because we asked. Swallow your pride and ask your neighbor if you may have that desk they are throwing out or if you may take a clipping of their prized hydrangea. Most people enjoy being generous and I have had more than a few craigslist finds end up cost less or even being free because I brought them a jar of homemade blueberry jam. I have also taken donations to my local thrift stores and asked them if I could trade them for things I'd been eyeing in the shop. Like I said it never hurts to ask!
  • Use less of nearly everything- In our home we use cloth napkins and dishtowels, sure I keep a few paper goods on hand but rarely use them. When you do laundry all the time anyways whats a few extra napkins to fold. 
  • Make Friends!- If you want to have a happier life make friends with everyone, you never know what might come of it. If you and a friend are both planning building or renovation projects you can work together and even go in together on materials. Most materials are cheaper when purchased in larger quantities and work can be done faster with the help. Both our neighbors and us are planning on re-staining our decks, together we can share a 5 gallon bucket of stain, application pads and a pressure washer rental and save over $100!
  • Love where you are!- By far the most important! Yes it would be nice to have everything you dream of but pining away for them just wastes your time. I want a tropical vacation on some far away sandy shore but I'd be just as happy with a day here on the river, splashing with my boys.


Alright, enough of that, it's time for me to live what I'm preaching and go paint my new closet organizer (in lieu of a walk in closet) then go snuggle with my little one!


Peace and sweet peas!

Saturday, April 16, 2011

German Pancakes


Crunchy, fluffy, and super easy German pancakes have stolen my heart!
I can't help feeling like this will become a regular request for Saturday Family Breakfast


German Pancakes:
1c. Flour
1c. Milk
1/4 c. Butter
6 eggs lightly beaten
1 1/2 tsp. Vanilla extract
1 tsp. Almond extract
2 tbsp. sugar
1/8 tsp. freshly grated nutmeg

Raspberry sauce:
1/2 bag good quality frozen raspberries
1/4 c. Sugar (adjust to tartness of berries)
1/2 tbsp. butter
pinch of salt
Place in a microwave safe bowl and heat 1-2 minutes of until sugar is melted. stir and drizzle over finished pancakes. 

Pre-heat oven to 350 degrees. Melt butter in 13x9 baking dish or  divide and melt in 2 pie pans.

In large mixing bowl combine flour, milk, eggs, extracts, sugar and nutmeg and whisk until smooth. Pour batter into buttery pans and bake in the oven for 35-40 minutes.


When the cakes come out they should be browned and puffy, mine have buttery pools in the center of them, YUM!

Dust with powdered sugar, cut into slices, drizzle with raspberry sauce and devour!

This is an easy and impressive dish to make for guests. Batter may even be made the night before.
serves 4-6

Next week I think I will try a savory version of this.  I'm thinking prosciutto, green onions, and cheese!

Join  us Saturdays at tatertotsandjello.com for the weekend wrap 
 up           party!


Peace and poofy pancakes!

Tuesday, April 12, 2011

Family Time

We've been...
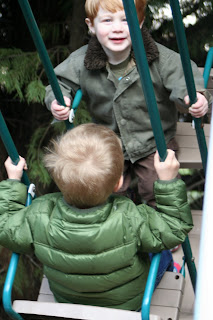
Swinging on the swing...

with our friends...

playing in the "Jungle"...

catching up with our cousins...

being sweet for gramma and nonno...

cheezing it up for the camera...

smiling and laughing...

pretending to be scary monsters...

smiling coyly...

getting in trouble for making mischief...

snuggling...

and just relaxing with our family.

Although bittersweet, we had a wonderful time with our family and managed to see just about every relative.
My husband's grandmother had a very joyous memorial with more smiles than tears, which is what she wanted. 
Best of all our boys we practically perfect angels!
We are happy to be home again but as always, it was hard to leave. :(

See you all soon with a few new things!
P.S.  Can you believe the feet on the left are 1 1/2 years older than the feet on the right!
That's Orion and his younger cousin Colter's piggies!

Peace and long car trips!

Friday, April 8, 2011

Frangelico Creme Brulee

One of the many benefits to working in a restaurant is that you learn all the little foodie tricks. One of my favorite things we serve is a Frangelico flavored creme brulee. Now if you do not drink or just don't feel like shelling out for Frangelico Hazelnut flavored Liquor then you can certainly use Hazelnut extract or even Hazelnut flavored coffee syrup.

1 quart half & half (traditionally it calls for heavy cream but 1/2 & 1/2 works fine, for 1/2 the calories!)
8 large egg yolks
1 cup sugar (divided)
1 shot frangelico 
1/2 vanilla bean split and scraped (optional but delicious!)

Preheat oven to 325 degrees

Bring the 1/2 & 1/2 and vanilla bean just to a boil in a medium sauce pan over med-hight heat. Once cream begins to boil remove from heat, cover with a lid and set aside for a few minutes

Whisk egg yolks and 1/2c. sugar until just lightened in color. Whisking like a mad woman temper the eggs by adding just a little of the hot cream at a time. I usually take a 1/3 measuring cup and add it 1 scoop at a time until well incorporated. Once all the cream has been whisked in add frangelico and divide the mixture between  6 ramekins. 

Place ramekins in a larger cake pan and fill pan with boiling water half way up the ramekins. Transfer carefully to oven and bake for 40-45 minutes or until the custards are set but still wiggly in the center.

divide the leftover sugar between the 6 ramekins and caramelize with torch. 
*If you do not have a torch- melt the sugar in saucepan until caramelized and pour over the top of each custard. 

these may be made ahead of time but they are always best fresh!
 Grab a spoon, crack the candy top, and enjoy! enjoy! enjoy!

***
We are headed out of town for a few days to celebrate the life of my husbands grandmother with our family and loved ones. No matter the age it is always hard to lose a loved one, but it is an opportunity for our very distant family to come together and share our love for such a beautiful person.
 I'll be back in a few days...

   
Peace let someone know you love them today!

Thursday, April 7, 2011

My French Country dream

Okay this is something I rarely do, but given my recent day dreaming of moving the family to Europe (which may actually happen in a few years)  I just had to share this with you.

maybe you've seen it and I'm just late to the party, but go and look again imagine yourself clipping billowy blooms from your beautiful french garden.

Or hearing the crunch of the gravel under your guests tires as they drive through your front gate

Cooking an impossibly fresh meal while your children run around in the gardens just outside

Antiquing at local fairs and binging home baskets brimming with hand monogrammed linens


Or just simply looking out your bedroom window across the cool misty fields each morning

All photos by Sharon Santoni at 


And I'm just warning you to make sure you've already showered or picked your children up from school before you spend the next 2 hours lost in Normandy with Sharon!


Peace Honey can we move to France?


Wednesday, April 6, 2011

Make a Pillow without measuring


Today I made this beautiful floral pillow, without even measuring!
wanna know how...?

I used a placemat! 
I love placemats, but with 2 little boys I never use cloth ones, cause I'd be washing them after each use!
I found these a while back on clearance at target and fell in love with the print. I also bought the coordinating napkins, which will either become large square pillows or basket liners.

Now because these palcemats have a backing you could just snip a little hole and fill it with pillow fluff and be done but I wanted these to match with the rest of my pillows so I chose to back them with my favorite tan ticking from Jo-ann's fabric.

So here's how you do it with out measuring, because sometimes placemats are just a little crooked and it's just a lot easier this way. 
Lay the placemat on top of your ironed backing fabric wrong sides together. Leaving about an inch all the way around, cut out your backing

Fold backing fabric over the top of the placemat and lightly iron to mark where your seam will be. Lift up the edge of the placemat and fold it back then fold the backing over itself and iron a nice crease. repeat on the other 3 sides, and don't forget to fold the corners to 45 degree angles.
with all your edges creased your backing should be the same exact size as your placemat and all ready to sew.

Sew about 1/2" in from the edge to make a flanged pillow leaving a hole the size of your hand at the bottom to fill the pillow. Fill with desired pillow fluff and sew the hole closed either by hand or carefully on your sewing machine (like I do).

toss the pillow on the couch you and enjoy!


Peace and clearance placemats!

Tuesday, April 5, 2011

Quick Tote Refashion


Heres a quick little spring tote I whipped up during Mason's nap


You can make a few too! All you need is:
 a canvas tote mine is approx 15"x15"
Similar sized scrap of fabric
thread
and a few cute buttons

I found these canvas totes at Michael's for $1 each a while back. I picked a few up figuring that saving me the time of sewing them together and making handles was worth a dollar alone. 

First you iron out your tote

 With bag inside out, line the side seams up in the center of your tote and iron flat, like so
Hard to explain, easy to do! : )

both corners of the bottom of the bag should be stacked 

Draw a line across the corners. I did a 4" line which will make the bottom of my bag 4". If you want the bottom to be wider make a longer line at the corner.

Sew along pencil lines on each corner. You should end up with something like this

Turn bag right side out and set aside. If you do not want to line your tote then you may skip the next few steps.
If you plan on adding a flower or other goodies to the outside of you bag sew them on now before adding the liner.

For the lining cut a piece of fabric to the width size as the tote. fold in half at bottom. My piece was 15"x 32" before I folded it in half. Fold the top edges over and press then fold over again and press to make a nice top seam.  If you want to add pockets to the inside of the bag sew them on before sewing the sides of the bag. Sorry I forgot to take a picture of that.
Stitch sides together  but leave the top alone for now

repeat the same corner technique as with the tote to make a 4" bottom to the liner

place the liner in your bag wrong sides together and top stitch the 2 together

Just like that you bag will be finished
I wanted to add a little extra ruffle, so I sewed 2 strips and added them to the tops of the handles

Ruffling is super easy just stitch your strip of fabric with very loose tension. I backstitch just a bit at the very beginning to make ruffling easier.
To ruffle the strip simply pull 1 of the 2 strings until desired ruffles are achieved!


I only added 1 pocket to the inside of my bag, but I did add a bit of ruffle to it :)

And just like that you take a $1 canvas tote and make a fabulous spring shopper

I use this fantastic tutorial to make my flowers, but beware, you'll be addicted and everything in your home will be covered in fabric flowers!


Peace is in the bag!
Related Posts Plugin for WordPress, Blogger...