Showing posts with label guest room. Show all posts

Monday, May 9, 2011

Cake Carrier Lamp

A few weeks ago I posted about my cake carrier lamp I made for my guest room/ studio space. Today I thought I'd show you how I put it all together. Actually it was alarmingly easy ( I say alarming because most of the time my hair brained schemes are a lot more work) 
I found my cake carrier for FREE at a yard sale but I have seen similar things on thrift shops and most certainly ebay.
As badly as I wanted to turn this into a lamp I had a big problem, the inside of the cake carrier is also bright yellow and when I placed it over an exsisting lamp the light it put out could only be described as "Bug Light" yellow, not what I had in mind for a bedside reading lamp. Husband said I should paint the inside, (NO way!) the bright yellow is the best part! I had to come up with another option, so I decided to try making a lamp with 2 lampshades, an inner white one, and my beloved cake carrier top.

Initial I wanted to find a lamp base at a thrift store but I was having trouble finding something that would work for the size of the cake carrier

So I caved and bought this new one on clearance at Target, totally not my style but hey it was only $8!

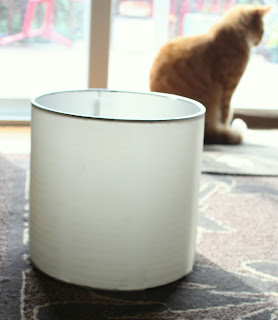
First thing I did was remove the, ummm...graphic print pattern from the shade as my kitty looked wistfully out the window. 
Her name is Meetu, because her personality as a little sister cat is "Me Too!"
Whoa, tangent!

Anyways, because the shade was 10" tall and I needed it to be 6"  I removed the vinyl, cut a 4" strip off and  hot glued the vinyl shade back onto the wire lamp shade things.

Then I covered the rebuilt lampshade in a light white fabric

 I painted the base of the lamp with the perfectly matching yellow spray paint I already had. How lucky is that?!
then with just a few glue dots i adheared the top of the cake carrier to the top of the lamp shade, clicked on the light and fell in love!

Here you can see the white shade underneath the top of the cake carrier.

since I did not alter the actual carrier I can always dismantle my lamp and still have a vintage cake carrier to use.


Bright Yellow Peace!

Monday, March 28, 2011

Silhouettes (the low tech way)

For my guest room/studio space I wanted to do silhouettes of my boys for a little pop. There are about a million ways to make silhouettes, here's how I did mine...

Silhouette Tutorial 

First start by taking a million profile shots of your subject, I put my boys in front of a very contrasty background and since I live where the sky is almost always foggy and white I just do it in front of our glass doors. 
Then upload your photos to your computer and go to you basic photo editing application, I use picasa, if you have it you could use photoshop, but then that's a whole different tutorial isn't it?
Once in you editing program crop your photo and turn the shadow scale all the way up until it looks all silhouette-ish like my darling boy there.

Print photos in black and white and cut, cut, cut
Once your silhouette is cut out lightly tape it to your cardstock.
I used the traditional black but they come out really fun if you use a brightly colored paper. I wanted to do mine in yellow but the Mr. didn't like the idea as much as I did.

Apply mod-podge or regular school glue to the back of your silhouette and place it on your background. I used those boards I painted to match my dresser.

smoosh (that's the technical term) out the wrinkles and bubbles. if it seems really wrinkly then place a sheet of wax paper over it and place it under a stack of books for a day or so to dry.

find something oval (because they are really hard to draw freehand!) and trace it onto your plaque


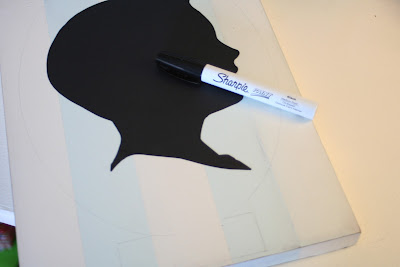
then with a sharpie paint marker, draw over your oval. I drew a little box on the bottom for a label too
I decided to write no. 1 &  no. 2 for my boys but you could always put their names or the date, whatever strikes your fancy! I might go back and add a little more embellishments to the oval, but I think I'll live with them for a while to decide what I want.

It may be low tech but it's still super cute!

Peace and paper scraps!
.

Wednesday, March 23, 2011

Late nights

Currently I am writing to you from my very own space! My fantastic (or at least I think so) brand spankin' new creative space! everything is organized, Diana Krall is quietly singing to me, everyone else is all tucked in and my greek yogurt has never tasted better! Seriously, the only thing that could make this better would be if I had 30 Rock re-runs playing in the background!

I can't quite show you yet, but I am just so excited that I have to share a little something, right?
a little peek of my desk, of course there's a succulent on it!

And a pretty little peek of June, you'll meet her soon I promise!

I cannot even begin to explain how inspired I am just by going through all my stuff and organizing it. I had sorta forgotten that I am actually a  jeweler and a painter! I came across so many sketches and ideas for pieces I never got around to. Hopefully this year will bring me back to a few of my true loves.

Well I better run, it will be a long day tomorrow working in Orion's kindergarten class and finishing up my space. Plus I have to get around to the rest of the house which I may or may not have completely ignored so far all week...


Peace, no boys allowed!

Monday, March 21, 2011

Ma'am Cave/ Guest room progress


I'm humming along (quite literally) on getting my ma'am cave/guest room all finished. Last week I showed you my dresser so I thought I'd show you how my new desk is coming along too!

I started by finding a simple but very pretty desk plan at Ana White's amazing site here

We modified ours a little to make use of what we had on hand
I'm almost finished painting, I can't wait to get it in my room!
many apologies for the cruddy pic!

Here's a little glimpse of what I've done to the top of my chalkboard wall
Yay! for Mhendi Art!


Peace and Chalk dust in my hair!

Friday, March 18, 2011

whatta you think? {2}


 Okay so I got this beautiful vintage cake carrier ages ago at a yard sale...for free! It was love at first sight and truth be told I would have paid at least $5 for it.  For a few years now I have just had it displayed on top of my kitchen cabinets, but I've always wanted more for it...

This morning while searching craigslist for a lamp I could transform for the guest room I had an idea.
Maybe I could make my adorable cake carrier into a lamp. I could use the top for the shade and the bottom for a base.
 It would be a bedside lamp so the fact that there would only be down cast light is okay by me.

Whatta you think?

Or I could just flip it over and use it as a bowl, but I think the lamp would be really cute

I just love the vibrant yellow inside!

Okay so, let me know what you think!
Also I can't wait to show you my painted dresser and even though it still has no drawer pulls I don't think I can't go any longer with out showing it to you!

Peace and Poppies
Related Posts Plugin for WordPress, Blogger...