 & Fresh baked bread!
Showing posts with label spring. Show all posts
Showing posts with label spring. Show all posts
Monday, March 12, 2012
Spring Fever?
 & Fresh baked bread!
Labels:
organic gardening,
spring
0
comments
Tuesday, April 5, 2011
Quick Tote Refashion
Heres a quick little spring tote I whipped up during Mason's nap
You can make a few too! All you need is:
a canvas tote mine is approx 15"x15"
Similar sized scrap of fabric
thread
and a few cute buttons
I found these canvas totes at Michael's for $1 each a while back. I picked a few up figuring that saving me the time of sewing them together and making handles was worth a dollar alone.
First you iron out your tote
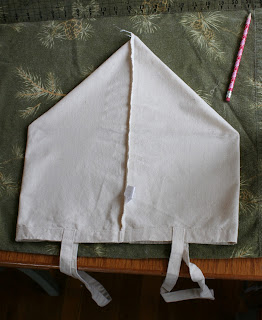
With bag inside out, line the side seams up in the center of your tote and iron flat, like so
Hard to explain, easy to do! : )
both corners of the bottom of the bag should be stacked
Draw a line across the corners. I did a 4" line which will make the bottom of my bag 4". If you want the bottom to be wider make a longer line at the corner.
Sew along pencil lines on each corner. You should end up with something like this
Turn bag right side out and set aside. If you do not want to line your tote then you may skip the next few steps.
If you plan on adding a flower or other goodies to the outside of you bag sew them on now before adding the liner.
For the lining cut a piece of fabric to the width size as the tote. fold in half at bottom. My piece was 15"x 32" before I folded it in half. Fold the top edges over and press then fold over again and press to make a nice top seam. If you want to add pockets to the inside of the bag sew them on before sewing the sides of the bag. Sorry I forgot to take a picture of that.
Stitch sides together but leave the top alone for now
repeat the same corner technique as with the tote to make a 4" bottom to the liner
place the liner in your bag wrong sides together and top stitch the 2 together
Just like that you bag will be finished
I wanted to add a little extra ruffle, so I sewed 2 strips and added them to the tops of the handles
Ruffling is super easy just stitch your strip of fabric with very loose tension. I backstitch just a bit at the very beginning to make ruffling easier.
To ruffle the strip simply pull 1 of the 2 strings until desired ruffles are achieved!
I only added 1 pocket to the inside of my bag, but I did add a bit of ruffle to it :)
And just like that you take a $1 canvas tote and make a fabulous spring shopper
I use this fantastic tutorial to make my flowers, but beware, you'll be addicted and everything in your home will be covered in fabric flowers!
Peace is in the bag!
Thursday, March 3, 2011
Green Spring Fever
Easy Moss Terrariums
I chose to make my mini-gardens in these inexpensive glass canisters I bought years ago at Michael's but any container with a lid works just fine.
Here in the north west moss is abundant but you can also order it online or find it at your garden shop.
I pulled mine off my front steps and washed it out in my kitchen sink, for free!
To make the terrariums you simply start by placing small stones or gravel in the bottom of your clean, dry container.
Then you sprinkle the stones with a bit of activated charcoal to keep the whole thing fresh. You can do with out the charcoal if you remember to remove the lid once a week or so to allow the container to "air" out. Basically the charcoal just keeps the closed environment fresh.
Next you sprinkle a small amount of potting soil over the stones, the amount of soil you add depends on how full you want the container to be. In my small containers I only added a few tablespoons of soil just to give the moss some nutrients and something to hold on to.
Last you add your moss. Sometimes I like to make them look like little green hills and other times I like to just rip up the moss into chunks and toss it in for a more natural look like the picture above.
If you want to add rocks, driftwood or other elements just place them in and then add the moss around it.
altogether this project cost me Nothing! I had the containers on hand and all stones and moss came straight out of my yard.
I have made several of these and I like to place them all over the house for fuss free greenery.
They also look beautiful in groups as a centerpiece, and make great gifts.
My son likes to imagine them as magical little fairy lands, you could even replace the rocks with little ceramic mushrooms or animals.
I'll be back soon to show you the next level of my obsession newest hobby!
spreading the love so,
Check 'em out!
Peaceful Greens!
Labels:
green digits,
march-ing on,
spring
8
comments
Subscribe to:
Posts (Atom)


