Silhouette Tutorial
First start by taking a million profile shots of your subject, I put my boys in front of a very contrasty background and since I live where the sky is almost always foggy and white I just do it in front of our glass doors.
Then upload your photos to your computer and go to you basic photo editing application, I use picasa, if you have it you could use photoshop, but then that's a whole different tutorial isn't it?
Once in you editing program crop your photo and turn the shadow scale all the way up until it looks all silhouette-ish like my darling boy there.
Print photos in black and white and cut, cut, cut
Once your silhouette is cut out lightly tape it to your cardstock.
I used the traditional black but they come out really fun if you use a brightly colored paper. I wanted to do mine in yellow but the Mr. didn't like the idea as much as I did.
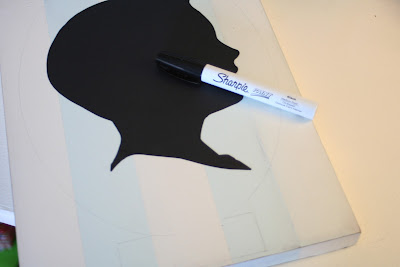
Apply mod-podge or regular school glue to the back of your silhouette and place it on your background. I used those boards I painted to match my dresser.
smoosh (that's the technical term) out the wrinkles and bubbles. if it seems really wrinkly then place a sheet of wax paper over it and place it under a stack of books for a day or so to dry.
find something oval (because they are really hard to draw freehand!) and trace it onto your plaque
then with a sharpie paint marker, draw over your oval. I drew a little box on the bottom for a label too
I decided to write no. 1 & no. 2 for my boys but you could always put their names or the date, whatever strikes your fancy! I might go back and add a little more embellishments to the oval, but I think I'll live with them for a while to decide what I want.
It may be low tech but it's still super cute!
Peace and paper scraps!
.


Just when I thought our boys couldn't be portrayed any cuter ~ here you go with these~ PLEASE make a set for Gramma . Love it!
ReplyDeletesuper cute is right!
ReplyDeleteI love the box you drew for the label, very unique!
ReplyDelete